
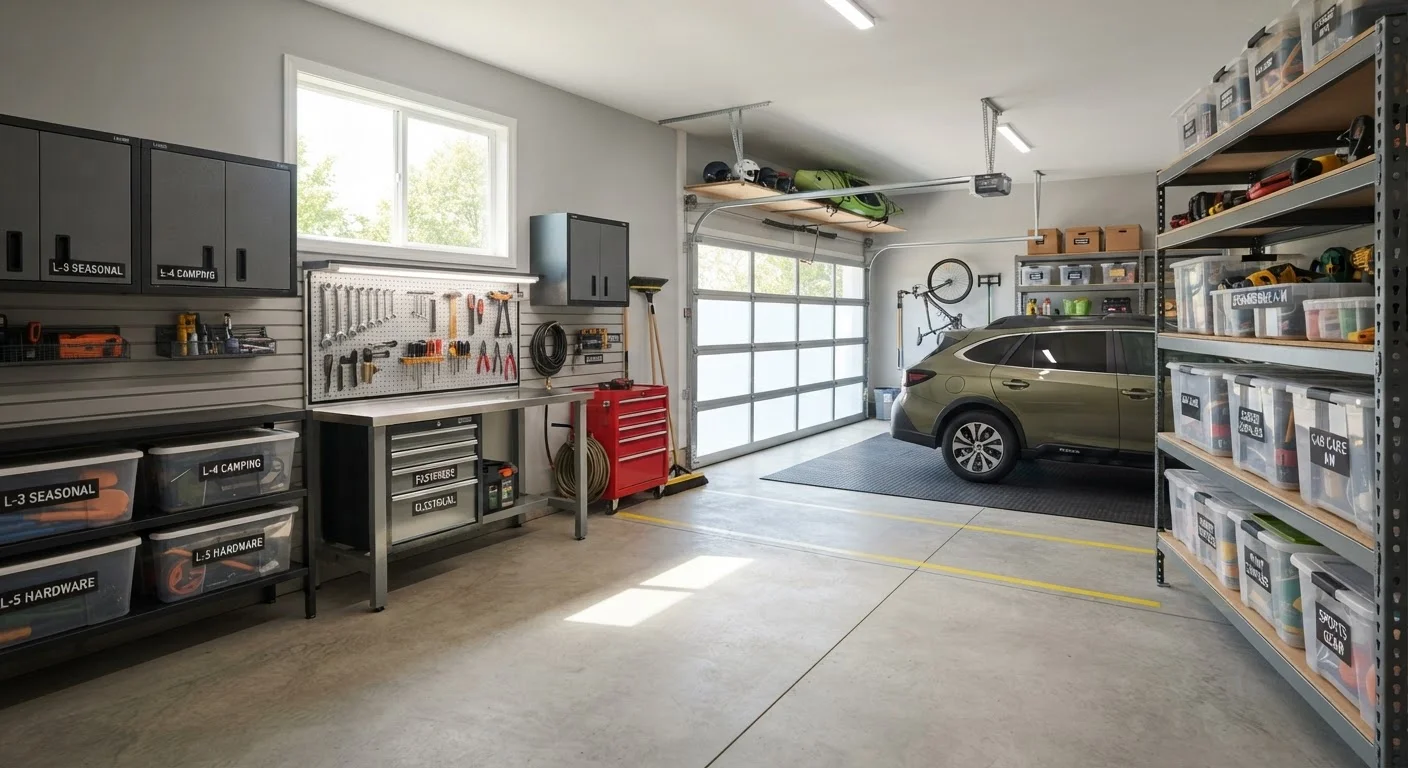
Why the Garage Stays Disorganized
The garage tends to collect everything that doesn't belong anywhere else in the house - and that's precisely why standard tidying rarely sticks. Without a deliberate structure, items accumulate by default rather than by design. Seasonal tools end up next to sports gear, holiday decorations compete for floor space with yard equipment, and the result is a room nobody wants to enter.
The solution isn't more bins. As discussed in common home organization myths, buying more storage containers before establishing a system usually makes clutter worse. What changes a garage is applying the logic of accessibility - the principle that how often you use something should determine exactly where and how you store it.
Before mapping zones or buying a single hook, it helps to understand a few core concepts. Key organizing terms like "prime real estate storage" and "dead zones" are especially relevant in a garage, where vertical space is abundant but often ignored.
Start With a Clear-Out, Not a Shopping Trip
Resist the urge to buy storage products before you've sorted and zoned. The number and size of containers you need becomes obvious only after you've grouped your actual items. Buying upfront almost always results in the wrong sizes - or duplicating storage you already own.
Planning Your Garage Zones
Zoning means grouping items by the activity or life area they belong to, then assigning those groups to dedicated regions of the garage. Common zones for American households include:
- Lawn and garden tools - shovels, rakes, hoses, fertilizers, and hand tools. These benefit from lawn and garden care proximity to the exterior door.
- Workshop and DIY - power tools, hardware, workbench supplies. Needs a flat work surface nearby.
- Sports and recreation - bikes, balls, helmets, camping gear. Bulky and best stored at perimeter walls.
- Seasonal storage - holiday decorations, off-season clothing, summer furniture cushions. Low-frequency items go on high shelves or overhead racks.
- Automotive - fluids, jumper cables, tire inflators. Stays near the vehicle, ideally on a low accessible shelf.
Sketch your garage footprint on paper first. Mark the vehicle parking area, the pedestrian door, and any fixed features like water heaters or electrical panels. Then assign your zones around those anchors. Zones closest to the interior house door should hold items used daily or weekly; zones farthest away can hold seasonal or rarely touched items.
What you will need
Wall Systems: The Most Efficient Use of Vertical Space
Floor space in a garage is precious - you need it to park, walk, and work. Wall systems move storage upward, which is where most garages have their greatest untapped capacity. Three formats cover most households:
- Pegboards
- Lightweight, highly configurable, and ideal for hand tools, cords, and small accessories. Mount pegboards to studs with a small gap behind the board for hook clearance.
- Slatwall panels
- Interlocking grooved panels that accept adjustable hooks, bins, and shelves. More durable than pegboard and suited to heavier items like power tools.
- Freestanding or wall-anchored shelving units
- Best for bins, totes, and boxed items. Anchor to studs whenever units will hold significant weight. Adjustable-height shelves give flexibility as storage needs change.
When installing any wall-mounted system, use a stud finder and appropriate fasteners. Systems holding more than 50 lbs. should always be anchored into structural framing, not drywall alone. If your garage has masonry or concrete walls, masonry anchors are required - standard wood screws will not hold.
Overhead Racks Require Ceiling Joist Anchoring
Ceiling-mounted storage racks must be fastened into ceiling joists, not drywall or insulation. An improperly anchored overhead rack holding heavy seasonal items is a serious safety hazard. If you are uncertain about joist location or load capacity, consult a licensed contractor before installation.
Step-by-Step: Building the System
With zones planned and wall systems selected, the following steps walk you through a full garage transformation. The process works whether you're starting from scratch or reconfiguring an existing space.
Empty and sort everything out of the garage
Pull every item out onto the driveway or lawn. Sort into four categories: keep, donate or sell, trash, and relocate (items that belong inside the house, not in the garage). Be honest - if you haven't used something in two or more years and it has no clear seasonal purpose, it's a candidate for removal.
Clean the empty garage thoroughly
Sweep or blow out dust, sweep corners, and inspect the floor for oil stains, cracks, or moisture. Check walls for mold or water intrusion before covering them with panels. A clean, dry surface is essential for adhesive mounting strips or properly seated anchor hardware.
Mark your zones on the floor and walls
Use painter's tape to mark zone boundaries on the floor. Label each taped area with a sticky note indicating the zone name. On the walls, use a pencil to lightly indicate where each wall system section will begin and end. This visual map makes it much easier to install hardware in the right locations before items are brought back in.
Locate studs and install wall systems
Use a stud finder to mark stud locations across each wall section. Install wall anchors, mounting rails, or directly fasten shelving brackets into studs. Work from the bottom up - install lower shelving first so you have room to stand and reach upper mounting points. Level each section before final tightening.
Return items by zone and frequency
Bring items back in zone by zone. Within each zone, place the most frequently used items at eye-to-hip height - the easiest reach. Less-used items go above eye level or on low floor-level shelving. Rarely used items (once or twice a year) belong in highest overhead areas or deepest corners. Bag or bin loose items before placing them on shelves.
Label every zone, shelf, and bin
Label each shelf level and each bin with its contents or zone name. Labels should be readable from a standing position without needing to crouch or tilt your head. Consistent labeling is what allows other household members to maintain the system independently.
Maintaining the System Over Time
A garage organization system only works if it's easy to use consistently. Three habits make the difference between a one-time cleanup and a lasting change:
- Label everything. Clear labels on bins, shelves, and hooks remove the guesswork for everyone in the household - including kids and guests. A label maker is useful, but handwritten labels on masking tape work fine to start.
- Schedule a seasonal reset. Twice a year - typically spring and fall - do a brief audit. Move seasonal items between active and deep storage, remove anything that no longer belongs, and re-evaluate whether zones still reflect how the household actually uses the space.
- Apply the one-in, one-out rule. Before adding a new item to the garage, identify what it will replace or displace. This keeps zone boundaries from gradually dissolving.
The underlying logic here applies beyond the garage. Households dealing with limited square footage elsewhere in the home will find similar zone-and-accessibility thinking at work in small-space storage solutions, adapted for rooms with far less room to work with.