Why Tile Fails - and What It Usually Has to Do With
Most failed tile installations trace back to decisions made before a single tile was set. Cracked grout, hollow-sounding tiles, and persistent moisture damage are symptoms, not root causes. Understanding what actually drives those outcomes is what separates a DIYer who succeeds from one who ends up re-doing the work in a few years.
The core issues are nearly always the same: an inadequate substrate, the wrong materials for the application, a rushed layout, or skipped waterproofing. This article covers the foundational principles that address each of those failure points - principles that apply whether you're tiling a small bathroom floor or a full shower surround.
If you're new to home improvement projects generally, our introduction to home improvement for first-time homeowners is a good starting point before tackling tile work specifically.
Substrate and Layout: The Foundation of Every Good Tile Job
No tile material - ceramic, porcelain, or natural stone - can compensate for a weak or uneven surface beneath it. The substrate must be flat, stable, and appropriate for the installation type. Floors need to meet deflection standards; walls need to be plumb and free of soft spots.
Always test your subfloor for flex before laying any tile.
Tile is rigid and will crack if the surface beneath it moves. A subfloor that deflects even slightly under foot traffic will eventually break the mortar bond or the tile itself. Walk the area and note any bounce, squeak, or give - these must be corrected first.
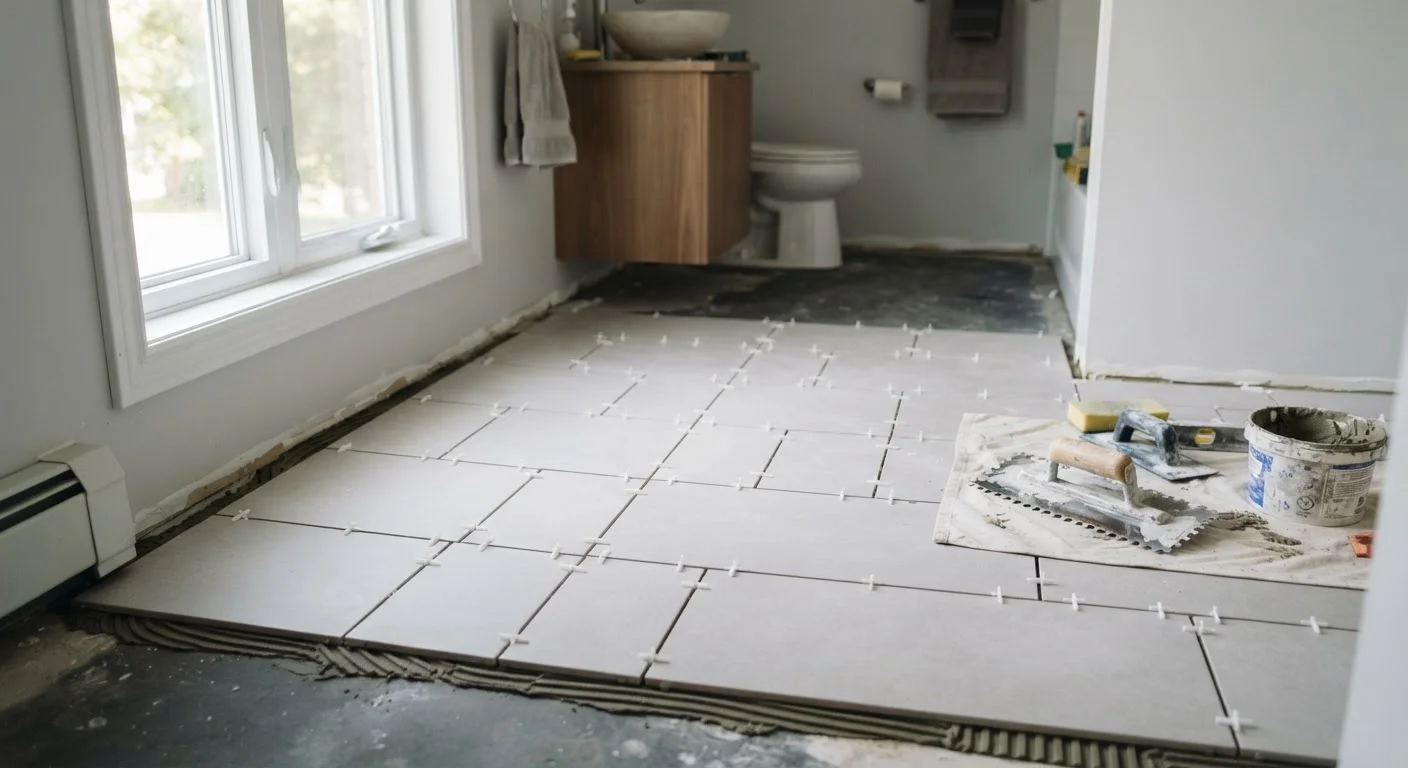
Plan your tile layout dry before mixing any mortar.
Snapping reference lines and doing a dry run with tiles reveals where cuts will fall, whether grout joints align symmetrically, and if small slivers will appear at visible edges. Adjusting layout on paper costs nothing; adjusting it after tiles are set costs everything.
Match your mortar type to the tile size and surface.
Standard thinset mortar works for most ceramic and porcelain tiles, but large-format tiles require a medium-bed mortar or back-buttering to prevent voids beneath them. Mastic adhesive, while easy to apply, is not appropriate for wet areas or floors.
Use a proper waterproofing membrane in all wet areas.
Cement board resists moisture but is not waterproof. In showers and tub surrounds, water that works through grout joints will saturate the substrate over time, leading to mold, substrate failure, and eventual tile loss. A bonded waterproofing membrane applied before tile prevents this.
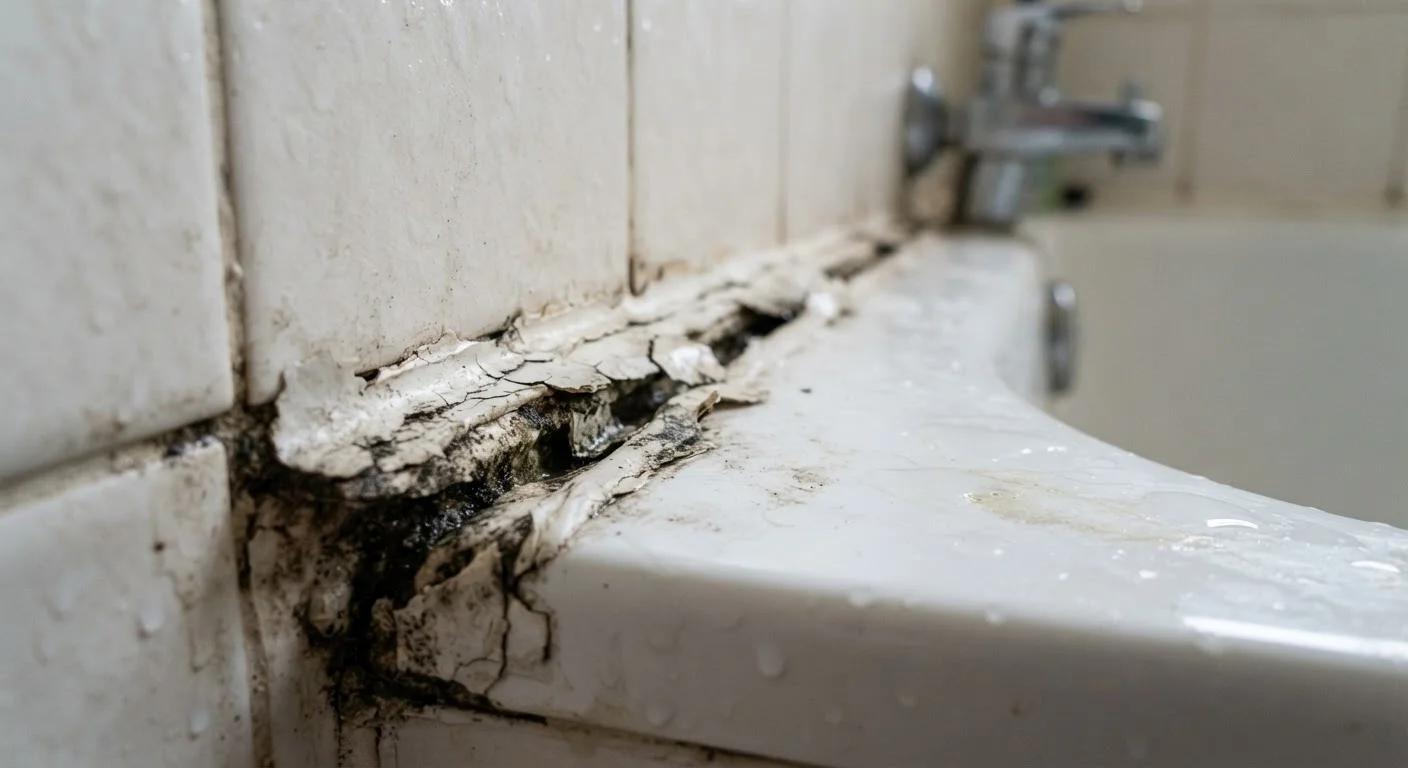
Use caulk - not grout - at all changes of plane and transitions.
Where a floor meets a wall, or where tile meets a fixture or countertop, the two surfaces expand and contract at different rates. Filling those joints with grout creates a rigid connection that will crack within months. A color-matched, sanded caulk creates a flexible joint that lasts. Our article on why caulk fails explains what goes wrong and how to apply it correctly.
Mix and apply grout consistently, and clean it before it hardens.
Grout mixed too wet loses strength and color consistency. Grout left on the tile surface too long hazes and is difficult to remove. Working in small sections, maintaining consistent mix ratios, and cleaning each section before moving on produces a clean, durable finish.
Layout planning is equally non-negotiable. Experienced installers spend significant time on reference lines and dry-fitting before touching mortar. This step reveals potential problems - awkward cuts at focal points, misaligned grout joints, narrow slivers at doorways - while corrections are still free to make.
Materials, Waterproofing, and Finishing Right
Choosing the correct mortar, grout, and waterproofing products for your specific tile and location is not optional - it's what determines whether the installation holds up over years of use or begins failing within months.
In wet areas particularly, waterproofing is where many DIY installations fall short. Standard cement board is a suitable tile backer, but it is not a waterproofing layer. A liquid-applied or sheet membrane installed before tiling is what keeps water from reaching the structure behind it.
Finishing details matter too. The joint where a tiled floor meets a tiled wall is one of the most common failure points in the entire installation - and it's one of the easiest to handle correctly with the right material. Understanding why caulk fails and how to apply it properly is worth reading before you reach that stage of your project.
When to Call a Licensed Tile Contractor
Large-format tile (anything over 15 inches), heated floor systems, or any tile work over a structurally suspect subfloor are jobs where professional involvement is worth serious consideration. Errors in those situations are costly to reverse. See our guide to hiring a contractor if you decide to bring in help.
This article provides general educational information about tile installation principles. Always verify local building codes and consult a licensed professional for projects involving structural, plumbing, or electrical elements.